
When you click on any of the affiliate links within the article, I may receive a small commission from qualifying purchases at NO cost to you.
I appreciate your support!
Tired of not knowing where you put certain tools? Want an easy way to know where everything is??
Then it's time to consider magnetic toolbox labels!
These labels are a simple yet effective solution to better organize your tool chest and easily identify the location of all your tools.
In this article, we'll explore the best magnetic toolbox labels available, so you can choose the one that fits your needs.
Alrighty, enough ‘screwing’ around let’s get to it! 

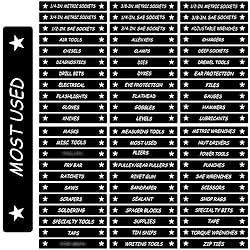
Image credit: George Trosley - georgetrosley.com
Key Takeaways
- Pre-made magnetic toolbox labels are the popular option if you want a quick and easy solution.
- There are a few DIY options available that offer more customizability.
- Consider these factors when shopping: text size, strength of the magnet, and resistance to oil, water, etc.
Best Pre-made Magnetic Toolbox Labels
Pre-made labels are the primary option for those who want a quick and easy solution.
These labels come pre-printed with common tool names and are ready to stick on your tool chest. They're available in different sizes and styles, so you can choose the one that suits you best.
Here are some of the best ones I found:
Toolbox Organizational Magnetic Labels
Dimensions: 4.5 x 0.75 inches
# of labels: 66
Colors: Black, Blue, Red White

Toolbox Magnetic Labels with Icons
Dimensions: 3.125 x 1.0 inches
# of labels: 80
Colors: Black

Toolbox Magnetic Rounded Labels
Dimensions: 4.5 x 0.75 inches
# of labels: 66
Colors: A lot!

Magnetic Labels Advanced Set, less (cheaper)
Dimensions: 4.5 x 0.75 inches
# of labels: 44
Colors: A lot!
5 DIY Customizable Options
If you’ve got an empty wallet and a bit of spare time, then you may prefer to make your own toolbox labels.
In this section, we’ll explore the top 5 DIY methods for creating customized magnetic labels – on a budget!
Option 1: Printing Labels on Magnetic Paper
This DIY option allows you to print your labels onto magnetic paper in the exact size and style that you need.

Materials Needed:
- Magnetic paper
- Printer
- Scissors (or paper cutter)
- Ruler (optional)
How to Create Toolbox Labels with Magnetic Paper
- You can use software like Adobe or Canva to create your labels, or you can use Microsoft Word or Google Docs to create a basic label design. If using Word, you can download pre-made templates.
- Once you have your design ready, load the magnetic paper and print the labels. Make sure to follow the manufacturer's instructions for printing on magnetic paper.
- After printing, cut out your labels using scissors or a paper cutter. Make sure to follow the edges of your design as closely as possible to ensure a clean-looking label. (You can use a ruler as a straight edge to help you cut straight.)
- Finally, attach your magnetic labels to your toolbox. The magnetic backing should adhere to any metal surface.
With this DIY option, you can create as many labels as you need in any size or style that you want. Plus, you can easily update your labels as your tool collection grows and changes. But it may not be so practical if you don’t already have a printer.
Option 2: Blank Magnetic Dry Erase Tags

If you prefer a simpler approach, while also having a personalized touch, then blank magnetic tags might be the perfect option for you. With these magnet tags, all you need to do is handwrite your labels and stick them on your toolbox.
Materials Needed
- Blank magnetic tags
- Dry Erase Markers (in case you need extra colors)
How to Create Toolbox Labels using Blank Magnetic Tags
Simply write on the magnetic tags using your dry-erase marker – that’s it!
The downside is that your tags can get accidentally erased if you bump into them. You can use a permanent marker to prevent this, but then you won’t be able to make any changes.
Option 3: Magnetic Tape & Label Maker

If you’ve got a label maker lying around (or if you need an excuse to buy one  ) then you’ll like this DIY option.
It allows you to customize your labels a bit, without having an external computer and printer.
Materials Needed
How to Create Toolbox Labels Using Magnetic Tape & a Label Maker
- Using a label maker, create a label with the desired text and font size.
- Cut a piece of magnetic tape to the length of your label.
- Peel the backing off the label and attach it to the magnetic tape. (You don't have to peel the backing from the magnetic tape.)
- Attach the magnetic label to your toolbox.
The magnetic tape allows you to easily move and reposition labels as needed, making it a flexible and convenient labeling option. Plus, you can peel off the label from the magnetic tape if you need to make changes in the future.
Option 4: Business Card Magnets & Card Stock Paper

This option is like #3 and #1, but the outcome can be slightly better.
The use of business card magnets combined with heavier card stock makes the labels come out thicker. But you will need a printer and a computer/phone to print your design onto the card stock paper.
Materials Needed
- Business Card Magnets
- Card Stock (Pick whatever color you like!)
- Scissors
- Printer
How to Create Toolbox Labels with Business Card Magnets
- Design your labels on your computer (or phone). Similar to Option 1, you can use design software or Word.
- Load your card stock into the printer and print the labels.
- Once printed, cut the card stock to be the same size as the business card magnet.
- Peel the backing from the business card magnet and stick the card stock on it.
- Attach it to your toolbox.
This option is also pretty neat because there are a lot of different card stock styles and you can print whatever design you want, so you can get very creative with it.
Option 5: Using Existing Refrigerator Magnet Tags

This is probably the cheapest and most creative way to make some toolbox labels.
It involves using some existing magnet tags and gluing some regular paper (or card stock) on top  .
.
You know those junk advertising tags you get in the mail sometimes? The ones where people promote their business.
Well, instead of throwing them away you can now turn them into something more useful!
Materials Needed
- Existing Magnet Tag
- Paper (or card stock)
- Glue Stick
- Scissors
How to Create Toolbox Labels with Junk Tags
- Cut a piece of paper, or card stock, to fit the size of whatever magnetic tag you have.
- Add a little glue to the tag and stick the paper onto it.
- Write whatever text you want on the paper. (You can also print something out using a printer and stick that onto the tag.)
- Attach it to your toolbox.
4 Benefits of Using Magnetic Tool Box Labels
Just in case you weren’t convinced yet, here are some of the benefits of using magnetic toolbox labels. (Apart from just having a more cool-looking toolbox  .)
.)
1. Improved Toolbox Organization
Magnetic tool box labels help you to keep your tools organized and easily accessible. By labeling your drawers, you can quickly find what you need without having to dig through all of them (I’m guilty of this...). This saves you time and effort, plus it ensures that your tools get put back in their proper place.
2. Easy Installation and Removal
Magnetic tool box labels are easy to install and remove. Simply place the label on the desired spot and you’re good to go! If you need to move or reposition the label, it can be easily removed and reattached.
3. No Adhesive Residue
Unlike traditional adhesive labels, magnetic toolbox labels do not leave any annoying residue when removed. This means that you can change the labeling of your toolbox without worrying about damaging the surface or leaving behind sticky adhesives.
4. Durability and Reusability
Magnetic toolbox labels are (mostly) durable and reusable; they can be used over and over again. This makes them very cost-effective.
Some Factors to Consider When Choosing Magnetic Toolbox Labels
Not all magnetic toolbox labels are created equal. Here are some factors to consider before making a purchase:
Label Size and Readability
The first thing to consider is the size and readability of the labels. You want labels that are large enough to be easily read from a distance, but not so large that they take up too much space on your toolbox. Make sure the font is clear and easy for you to read.
Material and Strength of Magnets
The material and strength of the magnets are also important factors to consider. You want magnet tags that are strong enough to hold onto the toolbox. Look for labels with high-quality magnets that are made from durable materials.
Resistance to Oil, Water, and Other Elements
Another important factor to consider is the resistance of the labels to oil, water, and other elements commonly found in a toolbox environment. Ideally, you want labels that can withstand exposure to these elements without fading or peeling. Although, some of the DIY options don’t really have this luxury.
Pre-made labels are the ones that are usually more resistant to oil and water, and that have a protective coating to prevent damage.
Conclusion & Final Thoughts (TL;DR)
In the end, the best magnetic toolbox labels are the ones that work best for YOU.
Whether you opt for pre-made labels or create your own, magnetic labels can save you time and make it easier to find the tools you need.
By using these labels, you’ll keep your toolbox organized and make it easier to locate the tools you need. Whether you have a small toolbox for basic repairs or a large chest for professional use, they can help you stay organized and work more efficiently.
Overall, they’re affordable, easy to use (easy to make if you choose to DIY) and can save you some time and frustration. I recommend giving them a shot and see how they work for you!
Do you have any other tips? Want to add something that I missed?
Feel free to leave a comment down below.
And if you're interested if more magnetic fun, you may enjoy reading about the best magnetic Hide-A-Keys or the best magnetic kitchen organizers.
See you in the next article, take care!
Frequently Asked Questions
Q: "What are magnetic labels made of?"
A: They’re made of flexible magnetic material; This material is a mixture of powdered barium ferrite or strontium ferrite and a polymer binder, which is then extruded or calendared to create a flexible, rubbery sheet with magnetic properties.
Q: "How strong are magnetic labels?"
A: The magnetic force of these magnetic labels is relatively weak compared to more powerful permanent magnets like neodymium magnets.
The strength of a regular magnet strip is typically measured in Gauss (G) or Tesla (T). Regular magnetic strips usually have magnetic strengths ranging from about 50 to 1000 Gauss (depending on their size and composition). For comparison, neodymium magnets can have strengths ranging from several thousand Gauss to over 10,000 Gauss.
Still, they’ll be strong enough to stick to your tool chest without problems.
Q: "How can I maintain and clean my magnetic toolbox labels?"
A: Simply wipe them down with a damp cloth to remove any dirt or debris.
If your labels become super dirty, you can use a mild soap and water to clean them. Be sure to dry them thoroughly before reapplying them to your toolbox. Avoid using harsh chemicals or abrasive cleaners, as these can damage the magnetic material and reduce its strength.